

Have you ever seen chocolate shaped like hearts or stars? They use chocolate molds to make those fun shapes! You can use molds too. Make your yummy chocolates at home. You can make dark chocolate bites or fun holiday candies. Even make chocolate bars you can break into pieces!
How to Choose Chocolate Molds
Have you ever wondered how to use chocolate molds? Making your chocolates is fun! The right mold makes it even better. Here are some different kinds of molds:
- Plastic molds: These are cheap and come in lots of shapes. They can break easily.
- Silicone molds: These are soft and bendy. Chocolates pop out easily.
- Metal molds: These are strong and last a long time. They can be tricky to use sometimes.
Benefits and Drawbacks:
- Plastic Molds: Pros are durability and shiny chocolates; cons are the need for careful maintenance.
- Silicone Molds: Pros are flexibility and ease of use; cons are less shiny chocolates.
- Metal Molds: Pros are quick temperature changes; cons are weight and maintenance.
How to Choose the Right Mold
Selecting the right mold depends on what you need. Here are some tips:
- For Beginners: Silicone chocolate molds might be the best start. They are easy to handle and you can learn without too much worry about breaking your chocolates.
- For Detailed Shapes: If you want detailed shapes, plastic molds might be better as they can give you clearer details.
- For Professional Use: Metal molds could be the choice if you are making large quantities, as they can handle lots of use.
Every kind of mold helps you make chocolate. Think about the shape you want, how many chocolates you’ll make, and how easy the mold is to clean. This will help you choose the best one!
Getting Ready to Make Chocolates
Before you make chocolates, you need to get your silicone chocolate molds ready. This helps your chocolates turn out great.
Clean those molds! Wash your molds with warm water and soap. It doesn’t matter what kind they are. Dry them well! Water will ruin your chocolate. You can put chocolate molds in the dishwasher.
When you’re done, wash and dry the molds again. Store them somewhere cool and dry. Keep them away from strong smells – your chocolate might taste funny if it picks up a smell.
Chocolate Time! The secret to shiny, smooth chocolate is to temper it. This means heating and cooling the chocolate just right. Tempered chocolate will snap when you break it and look nice and glossy.
Here are two ways to temper chocolate:
- Microwave Method:
- Chop the chocolate into small pieces. This helps it melt evenly.
- Put the chocolate in a microwave-safe bowl. Heat it for about 30 seconds at a time, stirring between each heat. Be careful not to overheat it. The chocolate should be just melted and smooth.
- Double Boiler Method:
- Put water in a pot and bring it to a simmer. Then, put a bowl on top of the pot. The bowl should not touch the water.
- Put the chopped chocolate in the bowl. Let the steam from the water heat the bowl and melt the chocolate. Stir often until the chocolate is just melted.
Both methods need careful watching. Make sure not to let the chocolate get too hot. If chocolate burns, it becomes grainy and loses its flavor.
Once your chocolate is tempered, it’s ready to be poured into the molds. This is how you start shaping your delicious homemade chocolate candies.
By cleaning your molds properly and tempering your chocolate, you set yourself up for success in chocolate molding. Each piece will come out looking great and tasting delicious!
How to use silicone chocolate molds
Let’s learn about using the silicone molds.
Filling the Molds
Making chocolate is like a fun puzzle! First, grab your silicone chocolate molds. These molds are bendy and great for beginners. Now, let’s fill them up:
- Get your chocolate ready: Make sure your chocolate is melted and smooth. If you need to, put it in a squeeze bottle or have a spoon ready.
- Fill the molds slowly: Start at one end of the mold and carefully pour the chocolate. Don’t go too fast! You want the chocolate to fill the mold nicely.
- Tap the mold: Once the chocolate is in, gently tap the mold on the counter. This helps get rid of any air bubbles that might be hiding.
- Clean up any extra chocolate: If there’s chocolate on top of the mold, use a spatula to scrape it off. This will make your chocolates look neat.
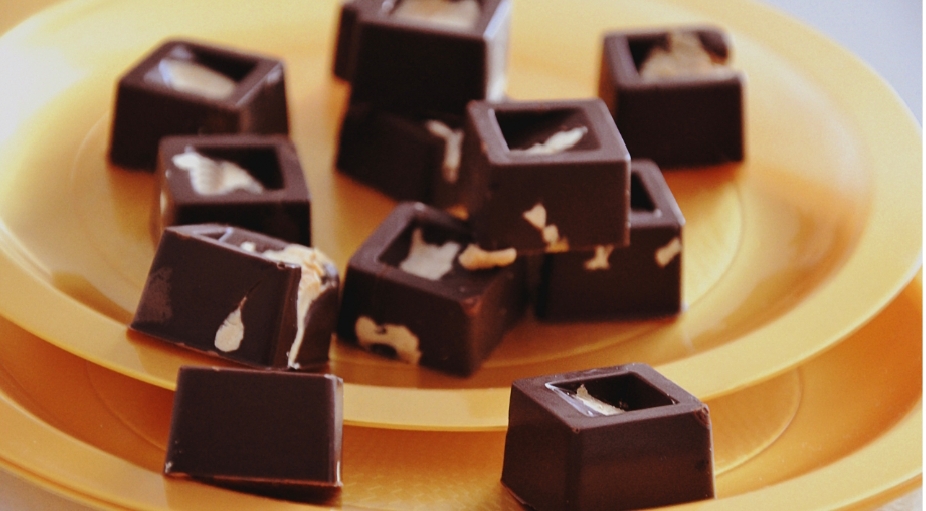
Adding Fillings
Now comes the fun part – adding yummy fillings to our chocolates!
- Think about what you love. Nuts? Caramel? Maybe flavored ganache? Anything goes!
- Carefully place your fillings in the mold on top of the chocolate. Make sure not to overfill. We want a perfect balance of chocolate and filling.
- If you’re feeling fancy, you can layer your fillings. Add a little chocolate, then a filling, then more chocolate. Repeat until the mold is full.
- Once your fillings are in place, cover them with more melted chocolate. Seal the deal! This will keep everything together.
Put your molds in the fridge. Let them get cold. When the chocolate is hard, take it out of the molds. Now you can eat your yummy chocolates! Share them if you want, but they might go fast!

Unmolding and Finishing Touches
Let’s find out how to give the finishing touches to our chocolates.
Unmolding Chocolate
Taking your chocolate out of the mold should be easy. First, make sure your chocolate is set. It should feel firm. Turn the silicone chocolate mold upside down over a clean surface. Gently press on the bottom of each mold cavity. The chocolate should pop out smoothly. If it sticks, try cooling it in the fridge for a few more minutes.
Decorating Your Chocolates
Now you can make your chocolates look special. You can use edible dust to give them a shimmer. Just brush a little on top of each piece. Another option is to use colored cocoa butter. It comes in many colors. Melt it and use a small paintbrush to add designs.
Adding Details
The chocolates look good You just need a few tricks. You can make your chocolates look like they came from a store and impress everyone!
Use a fine brush for tiny details. You can draw lines, and dots, or even write with the colored cocoa butter. Your chocolates can look special. You just need to try a few things. With a little bit of practice, you’ll be able to make chocolates that look like they came from a store.
Just follow these steps and your chocolates will taste yummy and look fantastic!
Storage and Presentation
Once your chocolate is ready, you want to keep it yummy. Here’s how to store your chocolate so it stays fresh:
Proper Storage:
Chocolates like it cool and dry. If they get too hot or wet, they won’t taste good anymore. Keep them in a box or jar that keeps the air out. Sometimes, it gets too hot in your house. In that case, you can put the chocolates in the fridge.
Presentation Tips:
- Box your chocolates to give as gifts. Use small boxes and line them with pretty paper.
- For selling, wrap each chocolate in foil. Add a label with your brand or a note about the flavor.
- Tie boxes with a ribbon or add a simple tag. This makes your gift special.
By storing and presenting your chocolates well, you make sure they stay fresh and look wonderful. This makes them perfect for sharing or selling.
Conclusion
We’ve learned how to pick, prepare, and use chocolate molds. Remember, choosing the right mold is key. Silicone chocolate molds are great for beginners.
silicone molds are great if you want to make lots and lots of chocolates! We talked about how to clean the molds, make the chocolate smooth and shiny, and fill the molds with yummy things. We also learned how to fill the molds and add yummy things like nuts or sprinkles.
Then you get to pop the chocolates out, store them, and make them look beautiful. Making your chocolates is super fun! You get to pick your favorite flavors and make them a special gift for someone.