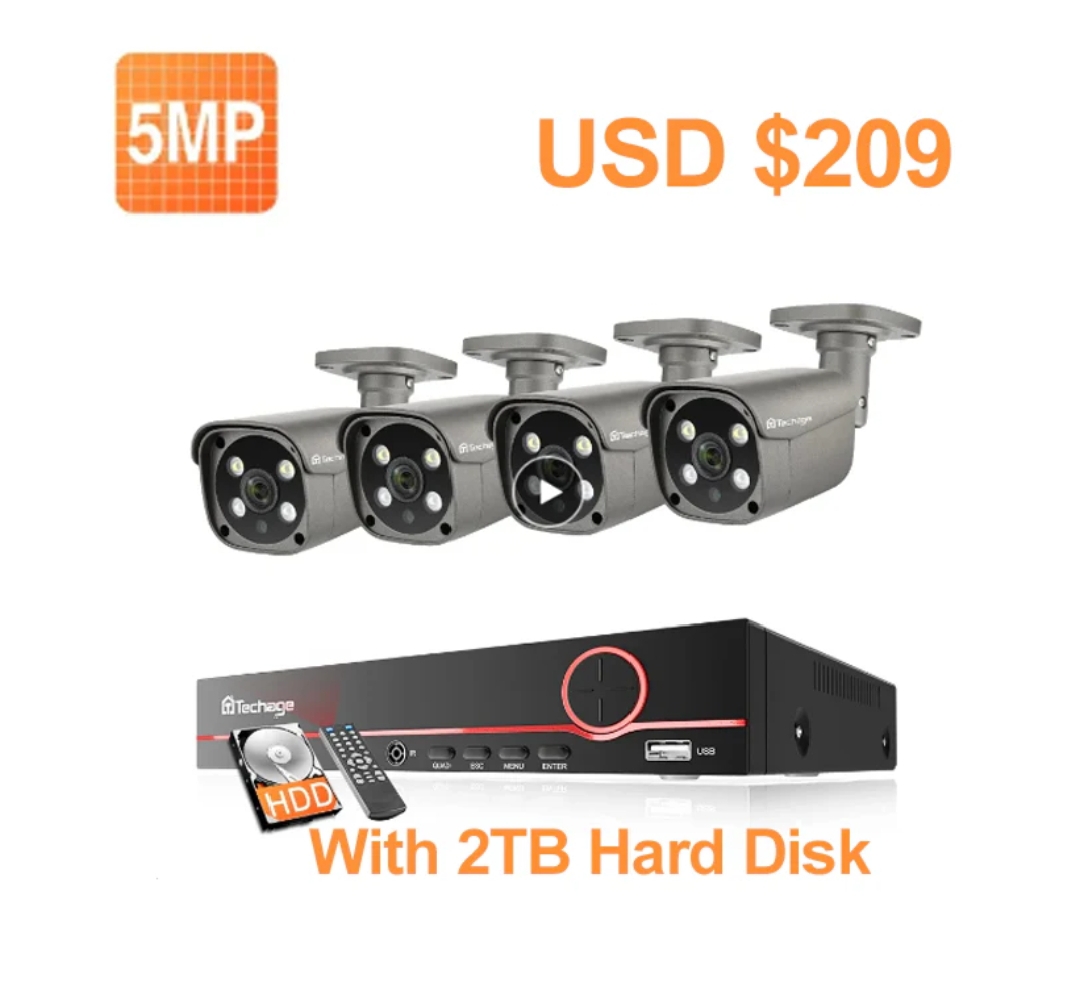
As a homeowner, ensuring the safety and security of my family and property is a top priority. After doing a lot of research and comparisons, I found that Techage was having an online promotion in their US warehouse. For just $209, I could get a 4-camera set with a 2TB hard disk. This great deal was one of the main reasons I chose this system, as I didn’t want to spend too much on surveillance. The Techage 5MP PoE Camera System includes 4 high-resolution cameras and an 8-channel PoE NVR with a 2TB hard disk, and it’s been a game-changer for our home security.
Key Features of the Techage 5MP PoE Camera System
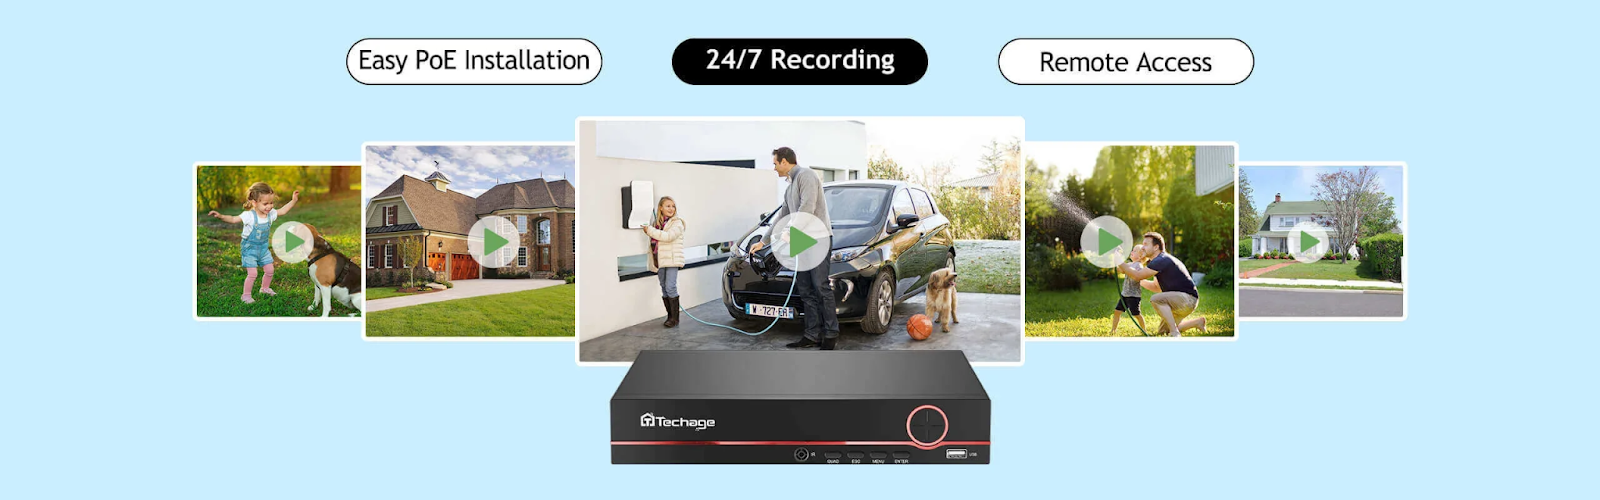
One of the standout features of this system is its expandability. The 8-channel NVR allows for the connection of up to 8 IP cameras, giving us plenty of room to grow our security network if needed. These security cameras themselves are robust, with an IP66 rating for water and dust resistance, and they offer powerful IR LEDs for high-quality night vision up to 30 meters.
Using the XMEyePro application, I can view live camera feeds from my mobile phone, tablet, or PC, which is incredibly convenient for monitoring our home while we’re away. The system also supports modern H.265+ technology, which reduces network load and minimizes recording sizes on the hard disk.
How to Install This PoE Camera System
Installing the Techage PoE Camera System was straightforward, even for someone like me who’s not particularly tech-savvy. Here’s how I did it:
Choose Strategic Locations: I decided to place the cameras in key areas around our home: one at the front door, one overlooking the driveway, one in the backyard, and one covering the side entrance. This setup ensures comprehensive coverage of the entire property.
Mount the Cameras: Using the provided mounting hardware, I secured the cameras in place. The durable build and weather resistance of the cameras gave me confidence that they would withstand outdoor conditions.
Connect the Cameras to the NVR: Each camera connects to the NVR using a single Ethernet cable, which transmits both power and signal (PoE). This simplified the installation process significantly, as I didn’t need to worry about separate power sources for each camera.
Setup the NVR: I connected the NVR to our home network via a network cable and then hooked it up to a monitor. The initial setup was user-friendly, and I was able to configure the cameras and adjust settings through the NVR interface.
Download the XMEyePro App: Finally, I downloaded the XMEyePro app on my phone and tablet, allowing me to monitor the camera feeds remotely. The app setup was intuitive, and I was up and running in no time.
Furthermore, if you’re uncertain about certain function settings, I highly recommend reaching out to Techage’s online support. They were incredibly enthusiastic and provided me with a wealth of assistance.
Limited-Time Offer
If you’re considering upgrading your home security, now is a great time to act. The Techage 5MP PoE Camera System is currently on sale in the US warehouse, with discounts of up to 50%. For just $209, you can get this comprehensive 4-camera set with a 2TB hard disk. However, there are only 4 sets left, so don’t miss out on this fantastic deal!
This system has provided my family and me with peace of mind, knowing that our home is well-protected. I highly recommend the Techage 5MP PoE Camera System for anyone looking to enhance their home security with a reliable and easy-to-install solution.